
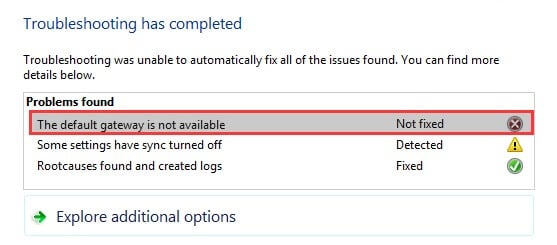
[su_dropcap style=”flat”]A[/su_dropcap]re you suffering from the issue “the default gateway is not available” and finding out the ways to solve the error?
If you’re seeing the above error message, you’re not alone. Many Windows 10 users face this problem, and they see the red X on their network computer icon and not able to use their internet connection due to limited or no connectivity.
The issue, default gateway not available, usually arises after upgrading to Windows 10. The Default Gateway is that part of your system which forwards packets from your network to outside networks. When this error occurred on your device, you will not be able to communicate with the outside network.
The default gateway is not available Windows 10 problem can prevent you from accessing the internet. So it’s important to know how to fix it.
Check out the solutions that help you to resolve the issue in no time.
Related Articles:
- How To Fix This Blu-Ray Disc Needs A Library For AACS Decoding Issue
- How To Check How Much VRAM Do I Have In Windows 10
Effective Ways to Fix The Default Gateway is Not Available on Windows 10
All the steps are done on Windows 10, but all these methods can be applied to Windows 7 and Windows 8 as well.
[su_divider top=”no” divider_color=”#070606″]
Method 1: Uninstall McAfee Programs from your PC
According to many users, McAfee security solutions may sometimes block your connection. So if you have any McAfee security programs installed on your PC, the first thing you can do is try uninstalling the software to see if it solves the default gateway is not available windows 10 keeps happening problem.
Here’s how to do it:
- Type “Settings” in the Windows Search box. After that, select Settings from the search results.
- Select Apps under Windows Settings.
- Now type “McAfee” in the search box and select the McAfee product you would like to uninstall.
- Click on the Uninstall button.
- Select Uninstall again to confirm that you do want to remove the software.
- Once it is done, close the Settings window and restart your PC.
If this method solves your problem, you can install alternative antivirus to the McAfee programs.
[su_divider top=”no” divider_color=”#070606″]
Method 2: Reset TCP/IP with the Netshell Command
TCP (Transmission Control Protocol) and IP (Internet Protocol) are required for a successful connection to the net. You can fix the error by resetting TCP/IP.
Follow the steps below:
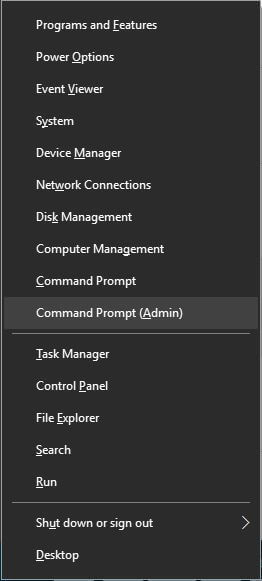
- Press Windows Key + X and choose Command Prompt (Admin) from the menu.
- When Command Prompt opens, run the command “netsh int ip reset” and press Enter.

- Next, if you’re using IPv4, type “netsh int ipv4 reset” and if you’re using IPv6, type “netsh int ipv6 reset” and hit Enter.
Note: If you don’t know what version of IP you’re running, just run both commands.
- After the process is completed, close Command Prompt and restart your PC.
These steps will remove and reinstalls TCP on your system.
[su_divider top=”no” divider_color=”#070606″]
Method 3: Use Another Network Adapter Driver
In this process, we will exchange the network adapter drivers with some different set of drivers that are already installed in the system. The network adapter drivers come in a set. Depending on the adapter, you may have a set of 802.11b, 802.11g, and 802.11n drivers or a set of 802.11a, 802.11n, and 802.11ac drivers.
Here are the steps to change the network adapter driver:
- Press Window Key + X and select Device Manager from the menu.
- Expand your Network Adapter option.
- After expanding it, the version of the driver you are currently using will be displayed. Right-click on it and select the Update Driver Software option from the contextual menu.
- In the next window, select the Browse my computer for driver software option.
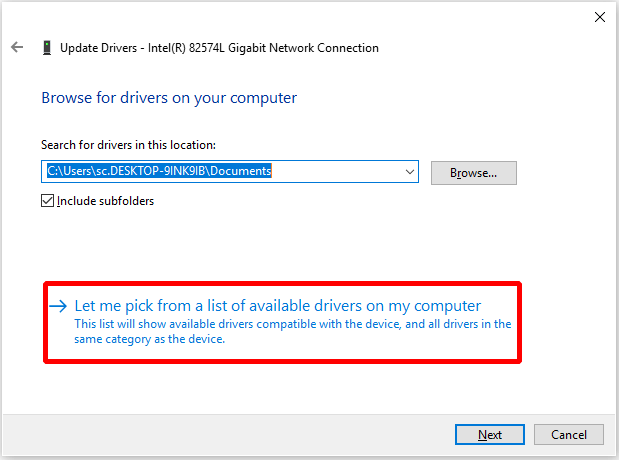
- Then, go for Let me pick from a list of device drivers on my computer option.
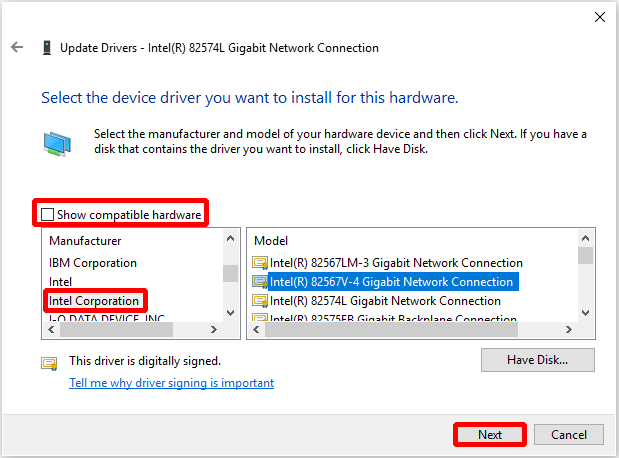
- A window appears prompting you to select the driver you want to install. Uncheck the option Show compatible hardware.
- Now, choose one of the listed drivers for your network adapter model. Choose a network adapter driver different from what you have now. Click Next.
- You will see an Update Driver Warning confirmation window. Ignore the warning and click Yes.
That’s all you need to do. Restart your PC to check if the default gateway is not available issue is resolved or not.
[su_divider top=”no” divider_color=”#070606″]
Method 4: Uninstall Network Adapter Driver
If the error still appears, uninstalling network adapter driver may resolve the issue. Uninstalling network adapter driver will not damage your PC because when the computer starts up once again, Windows will automatically detect your network adapter and then reinstall its driver.
Follow the steps below:
- Open the Run box by pressing Window Key + R together. Type “devmgr.msc” and hit the Enter key.
- Find the Network Adapters option and expand it by clicking it once.
- Now look for the network adapter you are currently using. Right-click it and select Uninstall from the context menu.
- Confirm your action and then restart your PC.
The network adapter will be identified and reinstalled once your system will boot up. Check whether the default gateway is not available error resolved.
[su_divider top=”no” divider_color=”#070606″]
Method 5: Change the Frequency of the Wireless Router
Your newer routers might support 5GHz frequency. But the problem is with the adapter you are using. The adapter might not work with this frequency so you’ll have to change it to 2.4GHz. Many users reported that after changing the frequency from 5GHz to 2.4GHz, the gateway issue had been solved.
Always check the router manual to change the frequency of the Wireless Router.
[su_divider top=”no” divider_color=”#070606″]
Method 6: Change the Power Saving Mode of Your Wireless Adapter
The default gateway is not available Windows 10 error might not occur if you change your power options.
First of all, you will have to change the Power Management settings for your network adapter. To do that follow these steps:
- Press Windows Key + X and select Device Manager from the list.
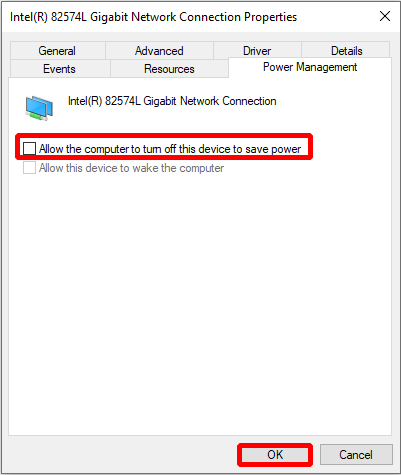
- Find the network adapter driver you are using, then right-click it to choose Properties.
- Go to the Power Management tab.
- Uncheck Allow the computer to turn off this device to save power.
- Click the OK button to save your changes.
Once the above steps are done, follow the steps below:
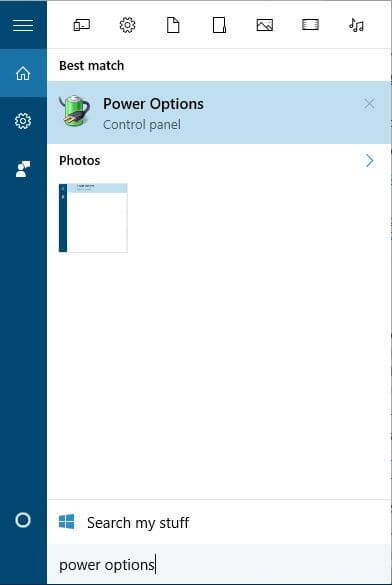
- Press Windows Key + S and Type “power options”. Select Power Options from the menu.
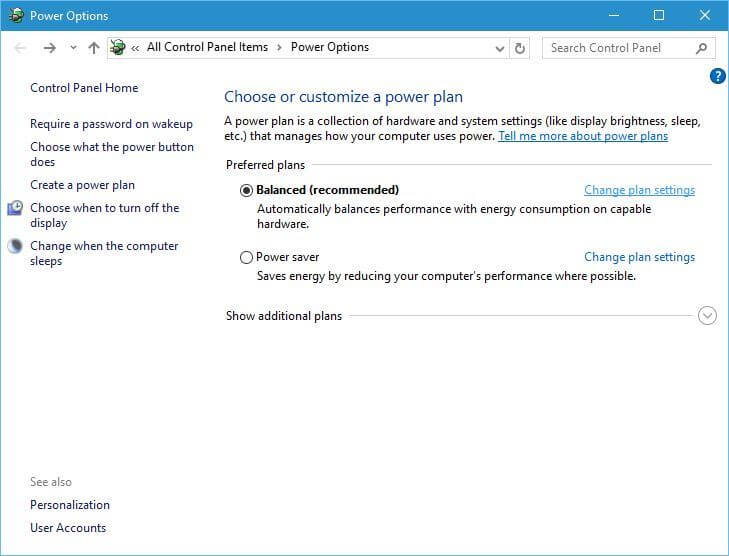
- Once Power Options window opens, locate your current plan and click on Change plan settings.
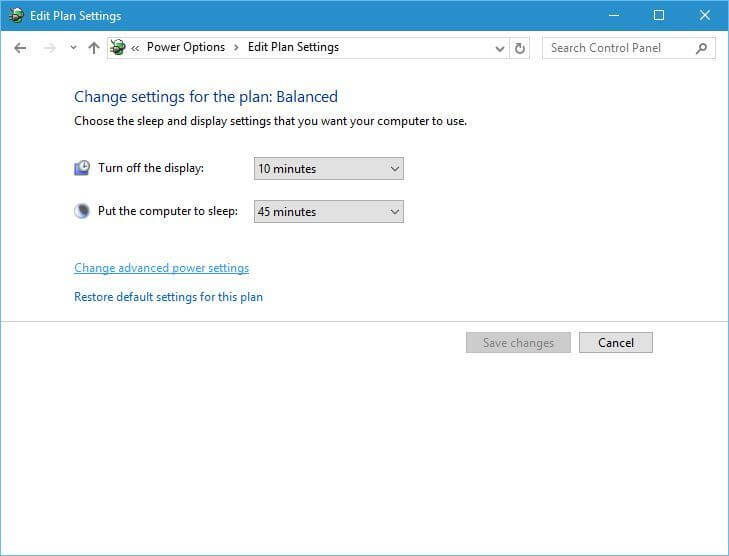
- After that, click on Change advanced power settings link.
- In the scrollable list, locate Wireless Adapter Settings. Now select and double-click it to expand the option.
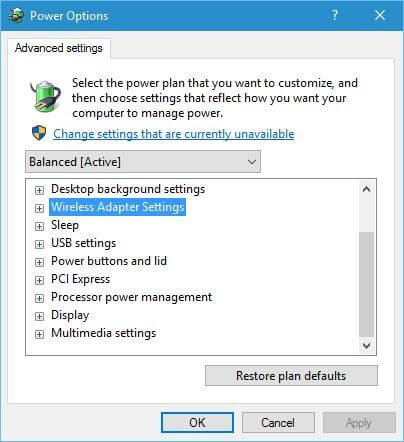
- Double-click Power Saving Mode to expand it as well.
- Set both On Battery and Plugged in options to Maximum Performance.
- Click Apply and OK to save changes.
[su_divider top=”no” divider_color=”#070606″]
Final Words
We hope after reading this article, you can find a way to fix this issue. To resolve “the default gateway is not available” error be sure to try all solutions from this article.
If you have a problem in any section, feel free to ask us in the comments section below.


![How to Fix [pii_email_57bde08c1ab8c5c265e8] Error](https://thetechvibes.com/wp-content/uploads/2021/08/How-to-Fix-pii_email_57bde08c1ab8c5c265e8-Error-218x150.png "How to Fix [pii_email_57bde08c1ab8c5c265e8] Error?")


