
[su_dropcap style=”flat”]F[/su_dropcap]usion is the best media library for Kodi that offers movies, series, and other entertainment content to its users. In this guide, we will show you how to install Fusion on Kodi. So keep reading.
Fusion repository allows you to install multiple add-ons for watching your favorite content. It lets you easily find and download hundreds of Kodi add-ons without having to look for external sources for Repository URLs.
Fusion offers all the popular addons and various utility and maintenance addons to make the streaming player like Kodi more useful and effective. You just need to install the Fusion and then install your favorite addons on all Kodi compatible devices.
Let’s not waste more time and learn how to get Fusion addon on Kodi.
Related Posts:
- How to Install Xfinity Stream on FireStick / Fire TV?
- Easy Steps to Install Spectrum TV App on FireStick/Fire TV?
Step-By-Step Guide: How to Install Fusion on Kodi
Follow the instructions below to install Fusion on Kodi compatible devices.
First of all, you need to allow the third-party addon installation by enabling ‘Unknown Sources.’
Here are the steps to do it:
- Launch Kodi.
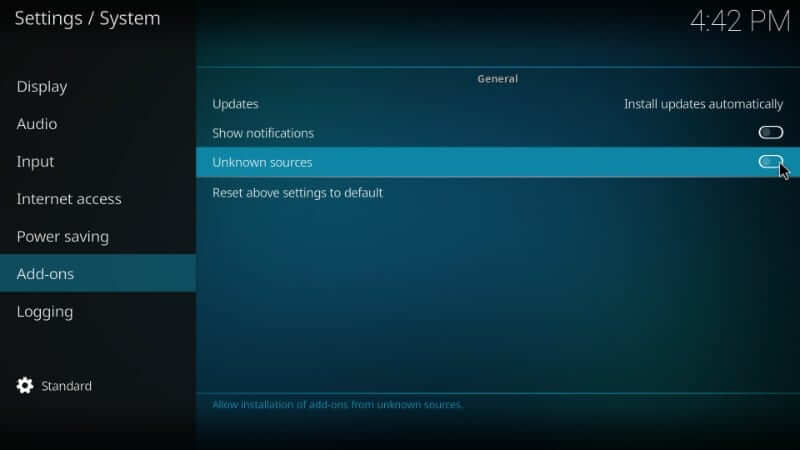
- Go to the Settings option from the home screen by clicking the gear icon on the top left.

- Now click System Settings.
- Click Add-ons on the left panel and enable Unknown Sources on the right.
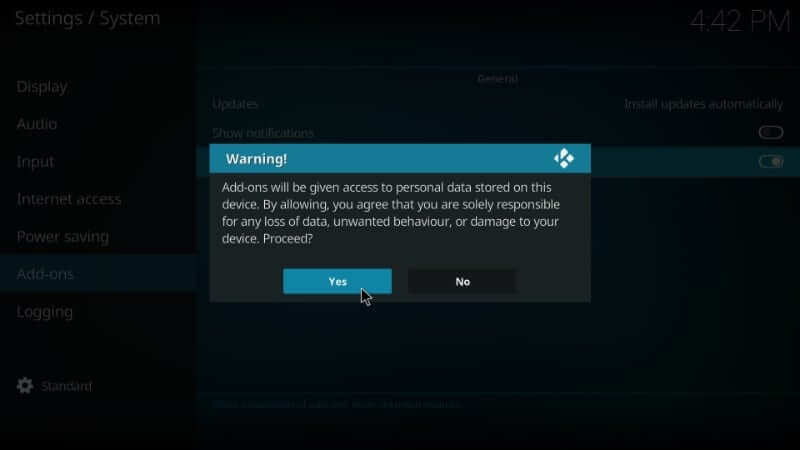
- After that following warning message will appear, click Yes to continue.
We already know Fusion is not exactly an add-on, but a source from where you can download several repositories and tons of addons.
Here is how you can install Fusion for Kodi 17 or Higher version:
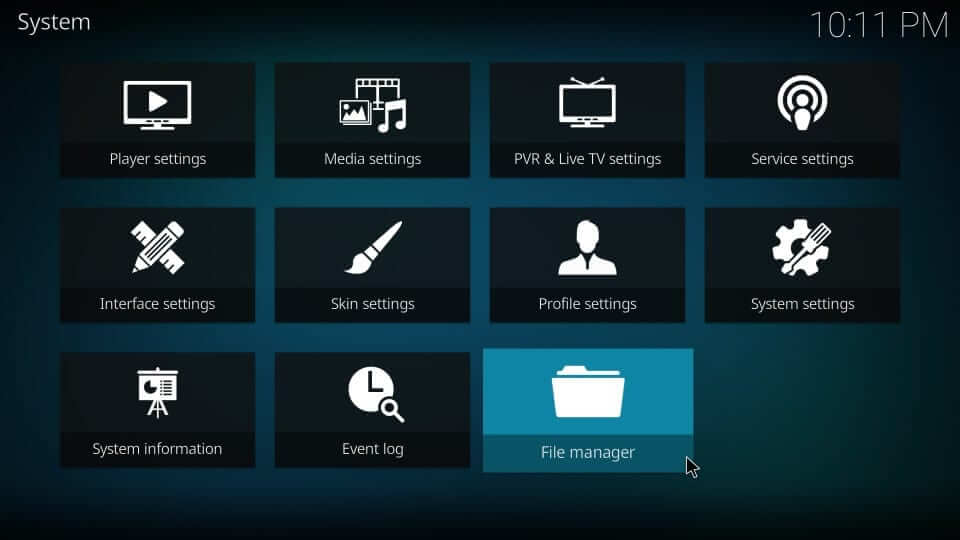
- Click Settings option(gear icon) on Kodi home-screen.
- Select File Manager.
- Now click Add source in the next window.
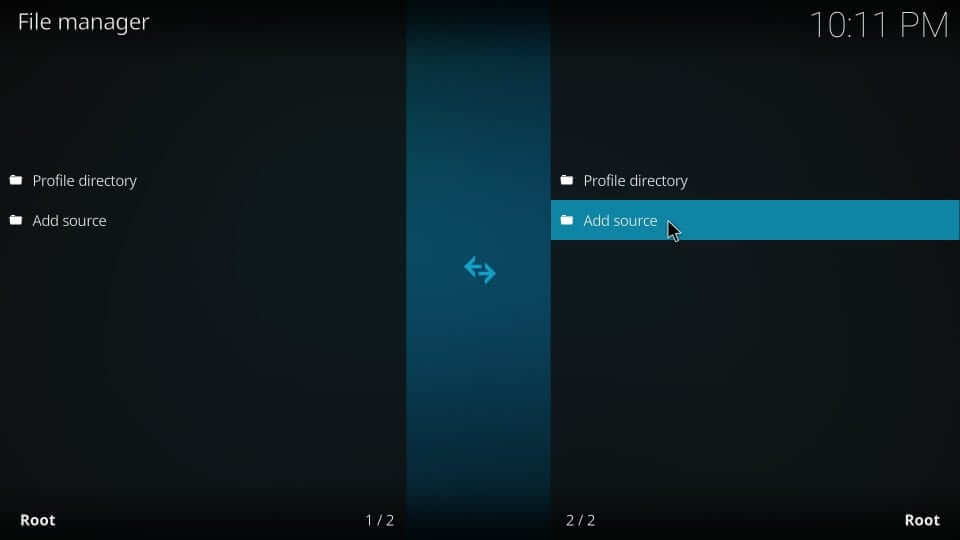
- Click on <None> under the Enter the paths or browse for the media locations heading.
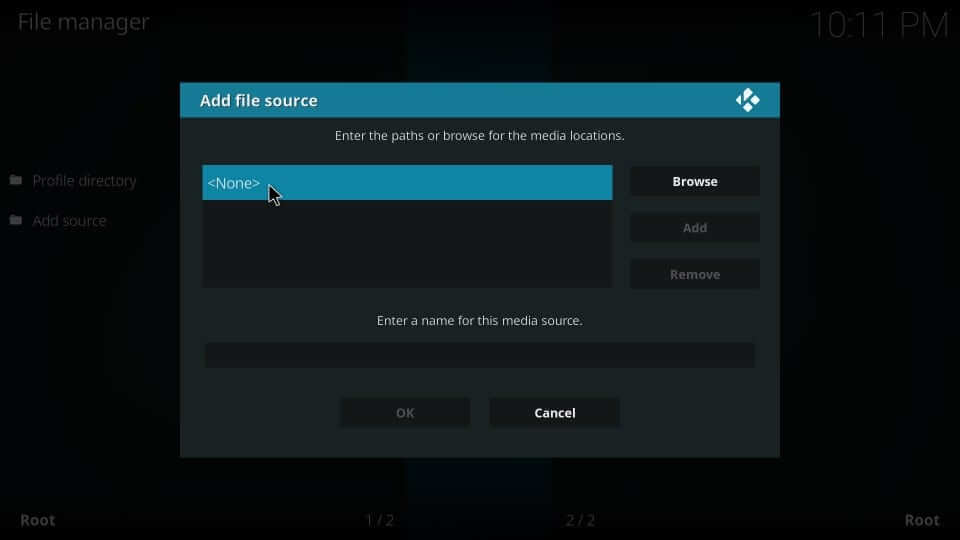
- Type in http://fusion.tvaddons.co and then press the OK button.

- In the next step, type in the name you want to give to this source. You are free to choose any name, but it should be relevant. Here the name given is Fusion.
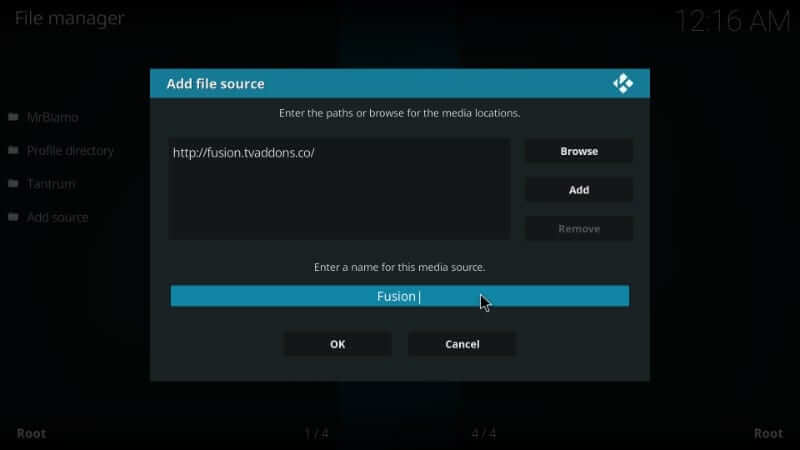
- Click OK to proceed.

- Now that the fusion source is added to your repository source list, you can return to your Kodi home screen and install the tools and addons from the Fusion source.
How to Install Repositories and Add-ons Using Fusion On Kodi
Once you’ve installed Fusion on Kodi, you’ll be halfway towards enjoying the best streaming experience possible.
Here are the steps:
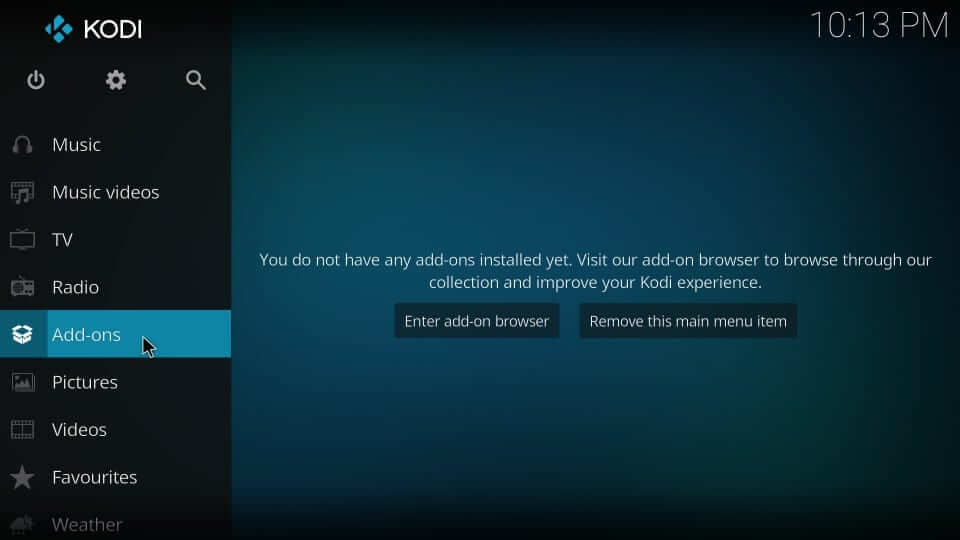
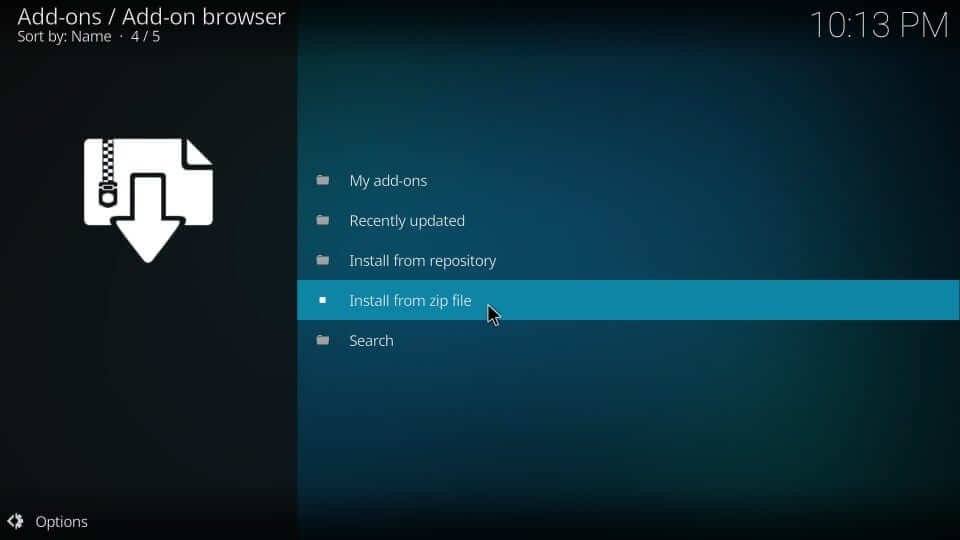
- Go to Kodi home screen and select Add-ons.
- Now click the box-shape icon on the top left corner.
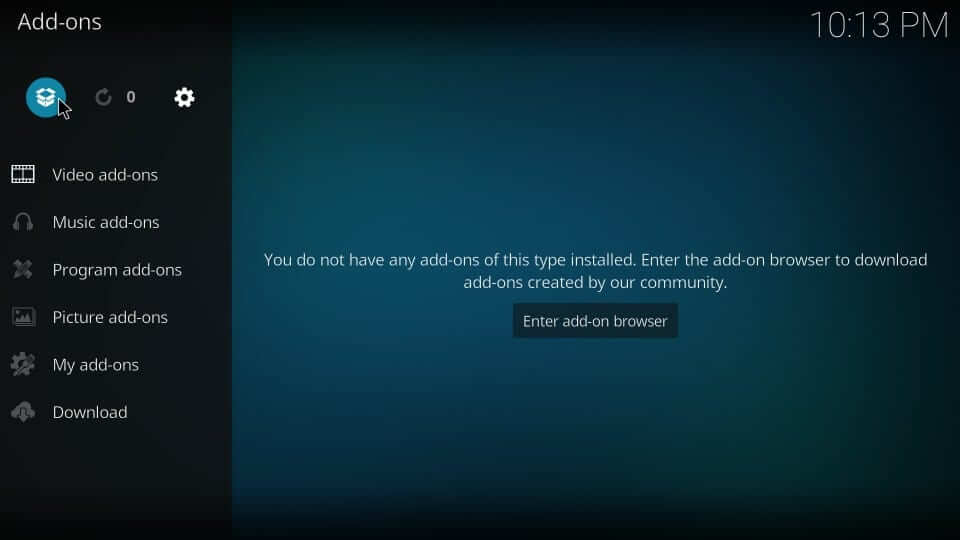
- Select Install from zip file.
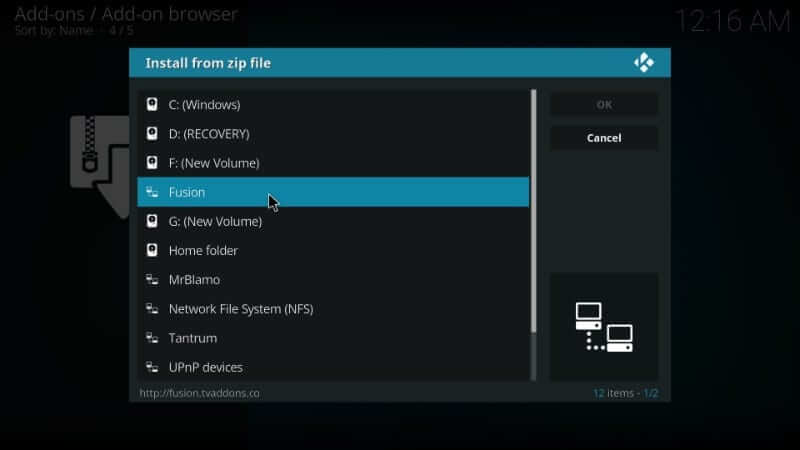
- Find the name of the media source from the list of sources. You named it Fusion in previous steps. We hope you remember this. Click OK.
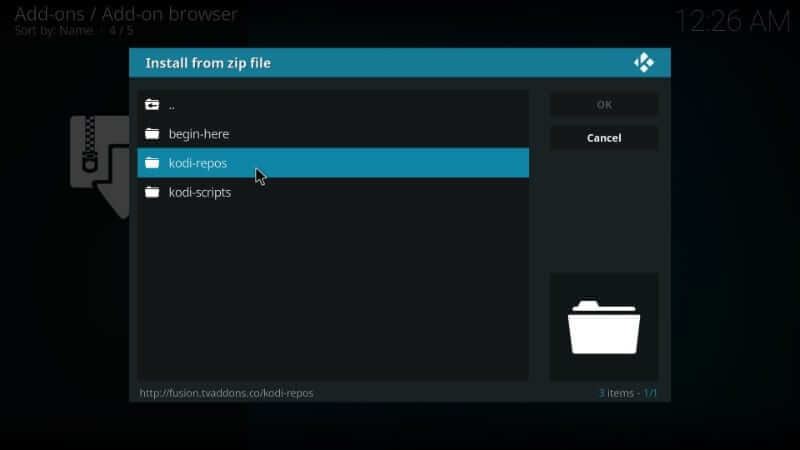
- In the next step, you’ll find Kodi Fusion repositories and add-ons organized into three categories:
begin-here installs Indigo, an excellent add-on that brings many tools and functions to Kodi.
kodi-repos holds repositories.
kodi-scripts holds dependencies, such as Meta Handler and URL Resolver.
- To install repositories and add-ons, click kodi-repos.
- Inside you will see the English option. Click on it.
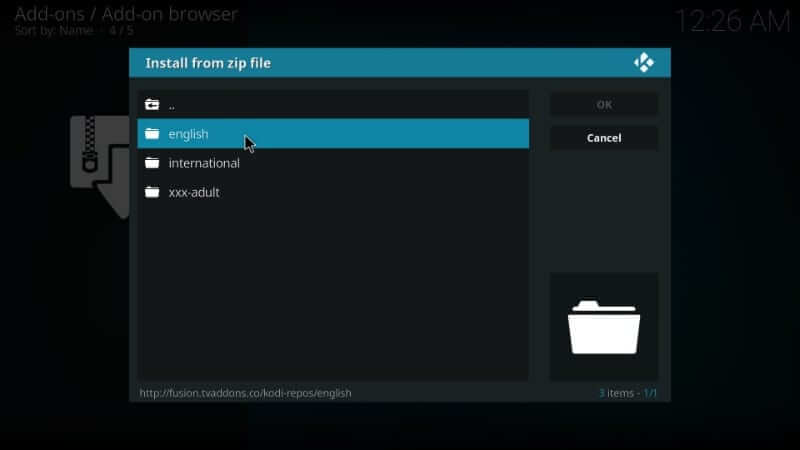
- On the next page, you will find a long list of available ZIP files.
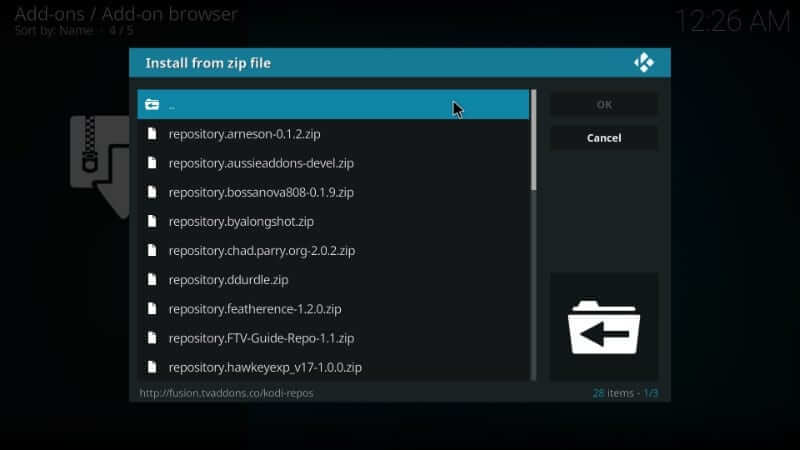
- Click the zip file of the repository you wish to install and enjoy watching content on Kodi.
Final Words
We hope you now understand how to install Fusion on Kodi and enable Addons using the Fusion Addon installer. For any query in the guide mentioned above, feel free to comment below.


![How to Fix [pii_email_57bde08c1ab8c5c265e8] Error](https://thetechvibes.com/wp-content/uploads/2021/08/How-to-Fix-pii_email_57bde08c1ab8c5c265e8-Error-218x150.png "How to Fix [pii_email_57bde08c1ab8c5c265e8] Error?")


